
It’s that time of year again when you pull out the old fenders in hopes of arriving by bike with less of the tell-tale leaf debris-mud coating your shoes and back side. “No problem!” you think, forgetting back to the last time you tried to install your fenders and ended up “installing” more bourbon than hardware before you gave up and took them into the shop.
Choose Your Style of Fender
Installing your own fenders doesn’t have to drive you to drink! The first step is to saving yourself some heartache is to start with the right fenders for your bike—and your needs.
Clip-on fenders strap around the seat post, arc behind the rear wheel and protect your backside. Some come with a front option, but many don’t. They are very easy to install – but also super easy to steal. If you’re a mostly fair-weather rider that doesn’t want to get caught out, this might be a good, hassle-free option for you.
Clamp-on fenders cover more of the circumference of your front and rear wheels than clip-on leaving you slightly more protected from the wet and grime. These are your best bet if you ride a bike that won’t take full fenders (like most road bikes) or don’t want to pay the extra money/take the extra time for special mounts to make full fenders work with your bike. These are also fairly easily stolen – though a few zip ties will make them less enticing. They also tend not to stay in place over time and will eventually cause the fender to drag against your tire, so while they may seem like a good idea off the cuff, they may cause more problems in the long-run.
Full Fenders are the ultimate protection from soggy underwear and street grit in your eye. They bolt into your bike, making them sturdy and semi-permanent. These are by far the best choice if you’re regularly riding for fitness or commuting. After installation they are the most hassle-free option and you’ll be covered all season long.
How To Choose the Right Fenders
It used to be that if you had a bike with special racks or disc brakes, you’d be stuck with clip or clamp-on options, but with the wide range of bikes on the market, the fender companies have finally created more options. Some bikes come specifically with special places on the frame (called “bosses”) where you can screw the bolts to attach full fenders. If yours doesn’t, you may need special parts like hose clamps or specially made brackets to attach them.
The best way to make sure you’re buying the right fenders is to head to your local bike shop with your bike and ask for their help in choosing what will work best for your bike. You might think you’re saving money by shopping online, but you can’t overlook the value of knowledgeable staff who’s expertise will save you time, money and possibly the embarrassment of coming in with a hang over and fenders in hand.
Installing New Fenders
Plan your time wisely. A clip on fender will only take 5- 10 minutes, and even less after the first time. Clamp-on might take up to a half-hour for your initial installation—but will still take 10-15 minutes to install each time after that. (Both take only moments to remove.)
The first time you install full fenders, plan on a two-hour job (around an hour per fender) if nothing goes wrong. In the case of most road bikes with drop bars, you’ll also need to remove the brake to get the fender mount attached, so be prepared to be able to adjust them back into the right place. This might add another 30 minutes to the job.
Sure, it might take you way less time than this, but one of the most frustrating aspects of bike projects is that they often take longer than we anticipate. I always recommend allotting extra time so that you’re more likely to finish early or on time and feel victorious, rather than feeling frustrated by a project that takes twice as long as you anticipated.
Before you dig in, make sure you have the tools and parts you’ll need. For clip or clamp-on, you can likely get away with some standard hex wrenches and possibly an adjustable (crescent) wrench. If you’re attaching the fenders to a frame or seat post you care about and don’t want scratched, apply electrical tape to protect the area where you’ll be attaching the fenders.
Full fenders usually require the same tools listed above though it may also be helpful to use metric box wrenches instead of a crescent wrench. It is not uncommon to have to shorten the length of one of the fender stays (the metal part that runs from the fender to the bike). Either a grinder or a large bolt cutters will suffice to get through the metal but with both the edges can be super sharp so plan on grinding or filing the rough edge down.
If your bike doesn’t have bosses, you’ll need hose clamps or something to attach the stays to the bike. For disc brakes or certain racks, you may need to both shorten and bend the stays to attach them properly. If your bike is one of these, plan on an extra 30 – 60 minutes of installation time. Some companies are now offering fenders that specifically are built for disc brakes so you may want to save yourself the time and trouble and just invest in those.
After installing, re-check all the bolts on the fenders before you roll. There is a bit of fooling around to get them attached so it’s easy to loose track of the one place you forgot to tighten. Sometime in the next month of riding, check them again to make sure they’re staying tight.
Removing Your Fenders
There are two vital parts of fender removal: 1) Don’t bother to remove your full fenders until you’re sure the rainy season has passed. 2) Keep track of how your fenders were installed so installation will go more smoothly next year.
For all fenders, take photos of where and how you they’re attached before you remove them. For full fenders, keep the parts for the front and rear fenders in two separate and labeled bags so you don’t have to guess next season which parts go where. Tape or secure the bags to the fenders so they don’t get lost.
Re-installing Fenders
Clip and clamp-on fenders will be fairly easy to re-install with the added benefit that if you’re taking them on and off regularly, you’ll be a pro.
Full fenders are much simpler to re-attach if you kept good track of how they were attached and the parts you used. Still plan on having the same basic hex and crescent or box wrenches on hand and for the re-installation to take around an hour—two if you didn’t keep track of parts and attachment.
A Job Well Done!
All that planning and prep should make the job go smoothly – leaving you with plenty of time for a beer or a nightcap as your reward. Now you can stay dry for another season!
RT @ORbike: Selecting, installing and removing bike fenders. Expert advice from @GraciesWrench https://t.co/eWCEmfziQr https://t.co/trA8K57…
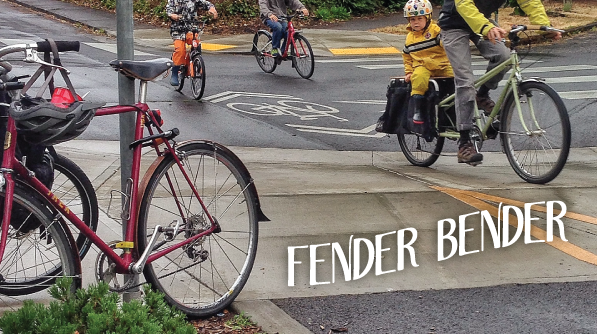
Hey! That’s my bike. And those are certainly my custom fenders–dare I say the nicest component adorning this old steed. 😉 The fenders are solid walnut, and are handmade right here in Portland. Sykes Wood Fenders are made by career furniture maker Paul Sykes, who uses a variety of woods, as well as recycled skateboard–made of layered maple. Naturally, I’m pretty smitten; and how cool is it that I won them through the raffle held at Portland’s Filmed By Bike Film Festival.
Glad to know someone appreciates my old school Trek (and it’s fenders) as much as I; its web debut!