
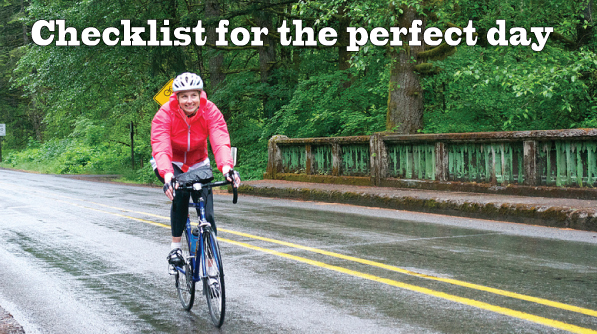
You’ve got the miles under your belt and the big day is on the horizon. Before you set off on your adventure, make sure to pack everything you need to make your first big ride a success.
A supported ride will have aid stations with food and water and a support vehicle to pick up riders in an emergency (also called a SAG wagon). Though it may seem everything is taken care of for you, life – with all its surprises – happens, even on a supported ride.
However, if you’re prepared to be even just a little self-sufficient, many challenges that pop up can be solved on the side of the road or avoided altogether – as long as you’re carrying the right stuff.
Food and Drink
Most rides offer food and drink at aid stations, but you should be eating and drinking regularly – not just when you stop. Bring two water bottles, especially on hot days and pack your favorite electrolyte that’s easily dropped into the water bottle. Keep one bottle for fresh water, and the other for electrolyte water.
If you have specific dietary needs, don’t rely on the rest stops to have exactly what you need to fuel your ride. Part of the run of a supported ride is indulging in the treats along the way, but if you know your body needs specific nutrients to go the distance, bring those along.
Do not count on the aide stations to feed you. One year on the Gourmet Century, I didn’t carry any food with me. I mean, it’s a whole ride dedicated to eating, right?
Big mistake.
When the course’s first big turn was not marked well and about twenty of us took off for an eighteen mile detour before the first rest stop, I was lucky enough that a kind (smart) woman had an emergency gel in her bag – otherwise I wouldn’t have made it. A little extra food very literally goes a long way.
Dress for Success
Often rides start earlier in the morning when it’s cool and heat up as the day goes on. Layering is key – as is planning for room in your jersey pockets or saddle bag to carry peeled off layers.
Going light is key – so don’t over pack. I like to loop a toe strap or long piece of Velcro around my feed bag so I can strap extra gear to it if I need to shed clothing or carry foul weather gear.
If it looks like rain, plan on the skies opening up at least part of the time and bring a rain jacket. Fenders and rain pants are bonuses for keeping warm. Latex gloves are a neat trick – they pack down small and can give you a layer of warmth and wind break between your skin and soaking wet riding gloves.
It’s pretty rare that a ride allows you to drop gear along the way (Cycle Oregon is one of the few exceptions) so come prepared to carry everything with you all day long and take that into consideration when you pack.
Roadside Repair
Even if you’re not a skilled mechanic, bring along some basics so that others on the ride can assist you if something goes wrong.
Well supported rides will have ride-along mechanics, but you can’t always rely on them being exactly where you need them to be when you break down, and waiting for support could take quite a while on an expansive course.
Having these basic tools and supplies with you will make it much easier to stay on your bike and not have to wait your ride out on the side of the road hoping to see the support vehicle on the horizon while you sadly watch all the other riders roll on by toward those finish line beers.
- Tubes: Carry at least one tube, but on a big day like this, having a second tube is quicker than resorting to your patch kit if you get two flats.
- Tire Levers: If you’re an adept tire-remover, two should suffice. Three if you have difficulty with your tires.
- Mini-pump: You’re going to need to re-inflate the tire, so this is pretty much mandatory. Pumps are the most dependable, but you can also use CO2 cartridges and chargers. However, their downfalls are: you have to carry the empties with you, you only have as many inflations as you have cartridges and you’ve better have practiced using them before the ride as they can be a little tricky for novice users. If you’re going to invest in a mini pump, it’s worth paying extra for one that has an easy-to-use pumping mechanism as not all of them are efficient in this regard.
- Patch Kit: What happens if you have the worst of luck and end up with a third (or worse yet fourth) flat of the ride? No fear. Even if you’re out of tubes, this can be a ride-saver. Plus, patch kits are tiny and don’t take up significant space or weight.
- Multi-Tool: A good quality multi-tool with a minimum of a variety of hex wrenches (2.5mm- 8 mm) and flat head and Phillips screwdrivers included should do the average rider. If you like to cover all your bases, you can get one that also includes a chain breaker.
- Cleat Bolts: If you are using clip-less pedals one or two extra cleat bolts don’t add much weight but will save your ride if your cleat comes loose. Yes, this does happen. More often than you’d think.
- Duct Tape: A foot length of duct tape wrapped around a small piece of cardboard can work as a tire boot, to strap a loose computer down, keep a broken spoke out of the way, repair a rim strip or even help with clothing malfunctions.
- Zip Tie: Having one or two of these up your sleeve is never a bad idea. Just ask MacGyver.
Quick Checklist
- Registration confirmation for smooth check in.
- Rider number if you received it in advance.
- Helmet, shoes and riding gloves.
- 2 water bottles.
- Electrolyes.
- Personal snack preferences.
- Clothing for the morning with your apparel for afternoon weather underneath and rain protection if necessary.
- Phone.
- Your camera if your phone doesn’t take good shots. Riding is all about the journey – capture it!
- Personal care: Sunscreen, ibuprophen, chapstick and chamois butter.
- Ride support phone number (if available).
- Basic tool kit.
- Finish line clothes stored at the baggage check (if available).
- A lock to secure your bike at the finish line if necessary, stored at baggage check. Some rides, like Petal Pedal, have an off-site parking lot and you’re not going to want to go there until you’re finished reveling in the post-event beer garden and gourmet dinner.
- Your outgoing sense of adventure! Supported rides are a fantastic way to make new friends.
How to Carry Your Gear
If you learn to pack well and carry compact items, you should be able to fit all of this in a large saddle bag, plus maybe a front-mounted feed bag.
If you prefer to use a backpack style water carrier, choose one with straps to hold a little gear, but in general I don’t recommend carrying anything on your back as it can become cumbersome after a long day of riding.
Mind Over Matter
The ride might be colder or longer or hillier or windier or whatever it is that makes it really hard for you. Try and keep in a positive and focused mind-set. Keeping the spirit of the ride seems like an easy thing to remember, but when adversity strikes, you’ll be surprised at what a difference it can make to have it around.
Roll with it… and keep the fun going!
If I’m going on a long ride I make sure I have two inner tubes, tools for changing when I have a flat, healthy snacks, coffee, water, bike pup, cellphone, headphones, maps, bike lights, a flashlight, rain gear if it’s supposed to rain, hand sanitizer, a camera, and an orange reflective vest.