Taking photos while riding a bike is hard! Dangerous even. I’ve been taking photos on my bike with an iPhone, cheapo digital cameras and DSLRs now for many years.
There are plenty of gadgets you can spend your whole paycheck on to make better pictures, but the best and cheapest way to improve your photography is thinking and learning.
Here are three tips I’ve found extremely helpful when shooting photos by bike.

Take lots of photos
Best advice I have is take photos. Lots of photos. That camera isn’t doing any good in your backpack, pannier, desk drawer. Have it accessible and stop and take photos constantly. This unfortunately involves lots of racing ahead, stopping, shooting, and then hurrying to catch back up. I really like the Peak Designs Capture Camera Clip on my backpack strap for super quick access. Porcelain Rocket makes a nice padded handlebar camera bag too. Look at them all and choose the best by looking at the bad designs to note what makes the good ones good and the bad ones bad.
Use a large memory card and don’t fret about the editing you’ll have to do later – it’s worth it.

Move around
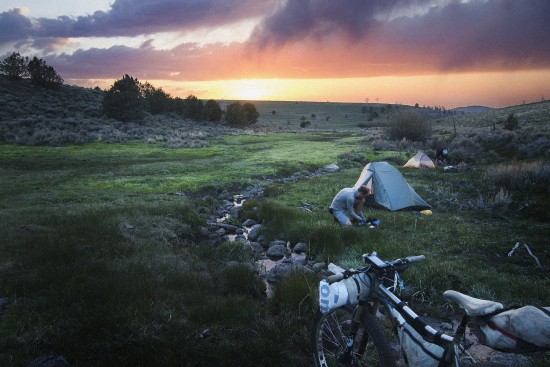
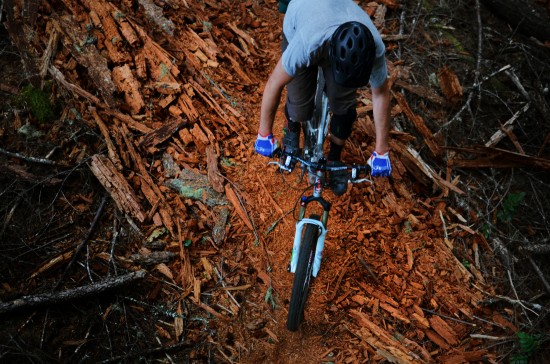
I’m not a professional photographer by any means, but what I’m lacking in technical knowledge I make up by running around a bunch. I squat, lay down, climb trees and jump in creeks to try to get a unique crop. Being able to identify the aspects of what makes a scene interesting is crucial. Find an angle that includes the neat clouds, an out of focus branch in the foreground, a rider, or some natural elements that frame your subject. Sometimes it works out. (the Oakridge shot from above I literally scrambled 20′ up a downed tree to get). Bonus: you’ll be a stronger riders, as a result.
Spend time looking at photos you love and think about what makes them attractive to you, then try to emulate that set up as you move around shooting.

Photos are just light
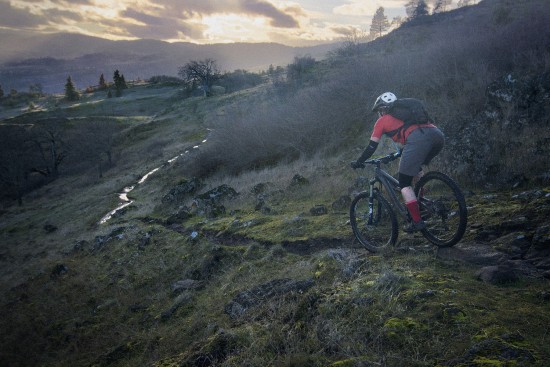
Photos are light bouncing and soaking. Pay attention to what’s going on with it. Are the shadows crazy? Is your subject backlit? Is there some strange fog or weather system? Before I got the above mountain bike shot of Syncline, the weather was wet and dreary all day long making for some pretty flat photos. But right before the day drew to a close, the sun popped out and lit up the trees and grass on the hillside before disappearing again. I didn’t have time to grab more than that one underexposed shot before the moment had passed, but it works!
How do you take photos?
Do you love to document your bike adventures? How do you manage to take photos while riding? Share your ideas (and questions!) below.
Gabriel Amadeus is an expert bikepacker who has explored much of Oregon’s rugged outback. He is a designer, explorer, photographer and writer. Gabriel is also one-third of Limberlost, the adventure tour company on a mission to share a richness of life.


3 handy tips for photo by bike by @gabrielamadeus on http://t.co/IGFpq2UMPp http://t.co/bbPu5lCuE1 #BikePhoto http://t.co/MMf2AC10Pw
RT @AyleenCrotty: 3 handy tips for photo by bike by @gabrielamadeus on http://t.co/IGFpq2UMPp http://t.co/bbPu5lCuE1 #BikePhoto http://t.c…
RT @AyleenCrotty: 3 handy tips for photo by bike by @gabrielamadeus on http://t.co/IGFpq2UMPp http://t.co/bbPu5lCuE1 #BikePhoto http://t.c…
RT @ORbike: 3 handy tips for photo by bike by @gabrielamadeus on http://t.co/i9e643CMfJ http://t.co/pBciVop2P6 #BikePhoto http://t.co/Y5Fe…
RT @AyleenCrotty: 3 handy tips for photo by bike by @gabrielamadeus on http://t.co/IGFpq2UMPp http://t.co/bbPu5lCuE1 #BikePhoto http://t.c…
RT @ORbike: 3 handy tips for photo by bike by @gabrielamadeus on http://t.co/i9e643CMfJ http://t.co/pBciVop2P6 #BikePhoto http://t.co/Y5Fe…